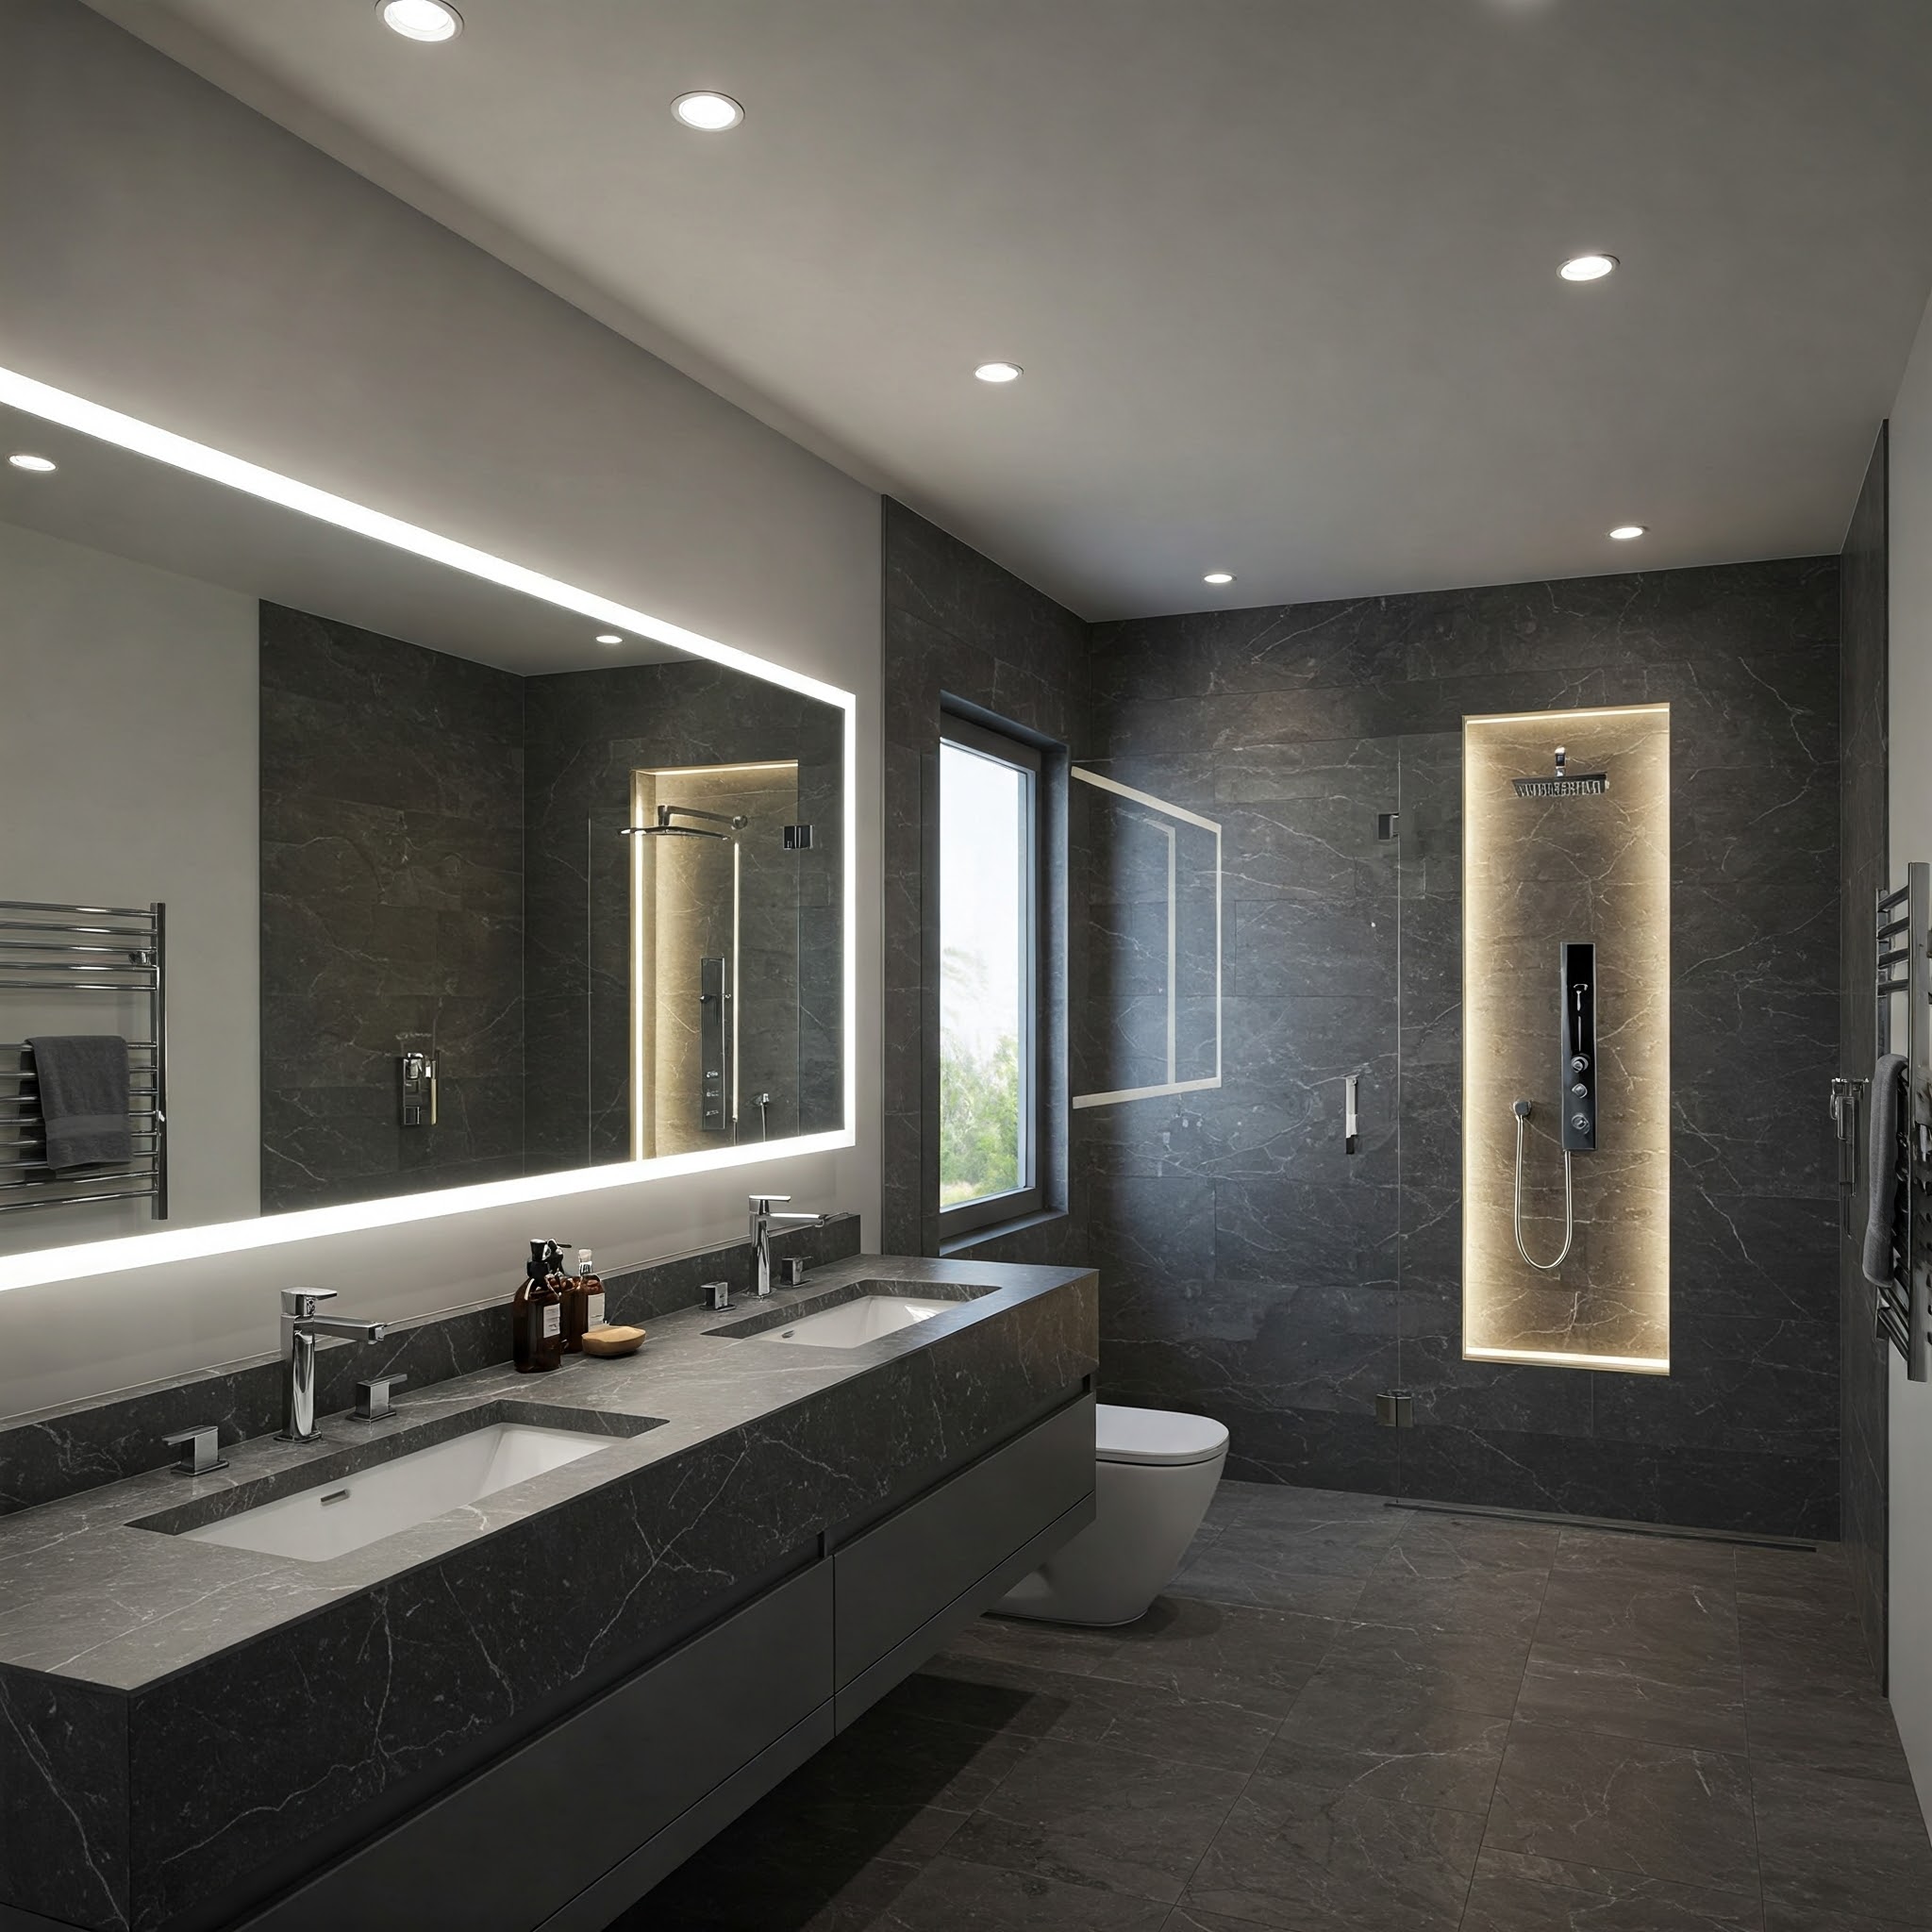
Bathroom lighting often gets reduced to a single, harsh overhead fixture, but this vital space serves multiple purposes, each with unique lighting requirements. From bright, clear light needed for grooming tasks to soft, ambient light for a relaxing bath, a well-designed bathroom lighting plan considers all these different needs. The key is layered lighting – combining various types of light sources to create a space that is functional, safe, comfortable, and adaptable. This guide explores how to choose the right bathroom lighting to meet your diverse needs.
Need #1: General Visibility & Safe Navigation (Ambient Lighting)
- Purpose: This is the foundation layer, providing overall illumination to safely navigate the room, locate items, and perform general tasks like cleaning. It reduces harsh shadows and creates a base level of brightness.
- How to Achieve:
- Recessed Lighting (Pot Lights): Evenly spaced across the ceiling, these provide broad, unobtrusive illumination. Ideal for modern bathrooms.
- Flush-Mount or Semi-Flush Mount Ceiling Fixtures: A good option for overall light, especially in smaller bathrooms or those with lower ceilings. Choose designs that diffuse light evenly.
- Chandeliers/Large Pendants (Use with Care): While often decorative, a central statement fixture can contribute significantly to ambient light in larger bathrooms. Ensure it provides sufficient general light, not just downward focus.
- Tips: Aim for even coverage across the entire bathroom. Install ambient lights on dimmer switches to easily adjust the overall brightness and mood of the room.
Need #2: Grooming Tasks at the Vanity (Task Lighting)
- Purpose: This is arguably the most critical lighting in the bathroom. You need bright, even, shadow-free light for tasks like applying makeup, shaving, skincare routines, and inserting contact lenses.
- How to Achieve: The goal is to illuminate the face evenly from the front and sides, minimizing shadows under the chin, eyes, and nose.
- Vertical Sconces Beside the Mirror: Often considered the best approach. Placing fixtures on either side of the mirror at roughly eye level provides cross-illumination, bathing the face in even light and eliminating shadows.
- Light Bar Above the Mirror: A common solution, but if used alone, it can sometimes cast downward shadows. It works best when it’s long enough to span the width of the mirror and is often supplemented by other light sources.
- Backlit Mirrors: Mirrors with integrated LED lighting around the edges provide soft, diffused light directly towards the face, excellent for reducing shadows. Often used in conjunction with other vanity lights for added brightness.
- Tips: Choose bulbs/LEDs with a high Color Rendering Index (CRI) – ideally 90+ – to ensure colors appear accurate (crucial for makeup). A neutral white color temperature (around 3000K-4000K) is often preferred for vanity tasks. Avoid placing recessed lights directly above where you stand at the vanity, as this creates harsh shadows on the face.
Need #3: Showering & Bathing (Task/Ambient/Safety)
- Purpose: Provides essential visibility for safety within the wet environment of the shower or tub. Can also enhance the bathing experience.
- How to Achieve:Use fixtures specifically rated for wet or damp locations. This is a crucial safety requirement.
- Recessed Downlights: Install one or more wet-rated recessed lights directly inside the shower ceiling or centered above the bathtub.
- Surface-Mount Wet-Rated Fixtures: Some low-profile ceiling fixtures are also rated for damp/wet locations.
- Tips: Ensure fixtures are properly sealed and rated for the specific zone (inside the shower is “wet,” above the tub might be “damp”). Putting shower lighting on a separate switch allows you to use it independently. A dimmer here can transform a functional shower light into soft ambiance for a relaxing bath.
Need #4: Relaxation & Ambiance
- Purpose: To create a calm, spa-like atmosphere conducive to unwinding during a bath or a quiet moment.
- How to Achieve:
- Dimmers: Essential for lowering the intensity of both ambient and task lighting layers.
- Accent Lighting: Consider adding subtle accent layers like:
- LED strips under a floating vanity or along a toe kick.
- Small, waterproof lights within shower niches.
- Uplighting concealed above cabinets or behind architectural features.
- Warm Color Temperature: Use bulbs/LEDs with a warmer color temperature (around 2700K-3000K) for ambient or accent layers intended for relaxation.
- Decorative Fixtures: While primarily ambient or task, the style of fixtures like sconces or pendants contributes significantly to the overall mood.
Need #5: Nighttime Navigation (Safety Lighting)
- Purpose: To provide safe passage to the bathroom during the night without the need for turning on bright, jarring overhead lights.
- How to Achieve: Implement very low-level lighting options:
- Low-Wattage Night Lights: Simple plug-in or hardwired options.
- Toe-Kick LED Strips: Subtle lighting near the floor level to illuminate pathways.
- Under-Vanity Lighting: Similar to toe-kick lighting, often on a separate switch or motion sensor.
- Dimmable Main Lights: Set ambient recessed lights to their lowest setting via a smart system or memory dimmer.
(Optional) Need #6: Highlighting Design Features (Accent Lighting)
- Purpose: To draw attention to specific architectural elements, artwork, or decorative features like textured tile walls.
- How to Achieve:
- Small Directional Spotlights: Recessed or track lights aimed at specific features.
- Picture Lights: To illuminate artwork.
- In-Cabinet Lighting: To showcase items behind glass doors.
Putting It All Together: Layering & Controls
The most functional and adaptable bathroom lighting uses multiple layers controlled independently.
- Combine Layers: Don’t rely on just one type of light. Ensure you have a good base of ambient light supplemented by effective task lighting where needed. Add accent or safety lighting based on your specific requirements.
- Separate Switches & Dimmers: Control different layers or zones separately. Have switches for ambient ceiling lights, vanity lights, shower lights, and potentially accent/night lights. Install dimmers wherever possible, especially for ambient and vanity lighting, to provide maximum flexibility in adjusting brightness and mood.
Conclusion
Planning your bathroom lighting around the different needs and activities that take place within the space is key to creating a room that is truly functional, safe, and enjoyable. By implementing a layered lighting approach – combining general ambient light with focused task lighting for grooming, ensuring adequate light in wet areas, and considering options for relaxation and nighttime safety – you can design a bathroom lighting scheme that adapts to every requirement. Thoughtful fixture selection and the use of separate controls and dimmers are the final touches that bring a smart lighting plan to life.


Leave a Comment